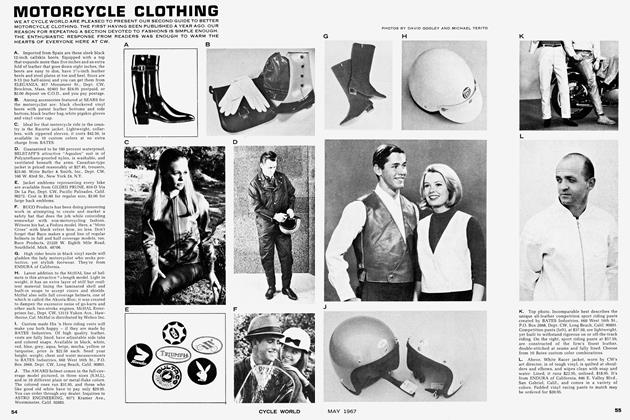
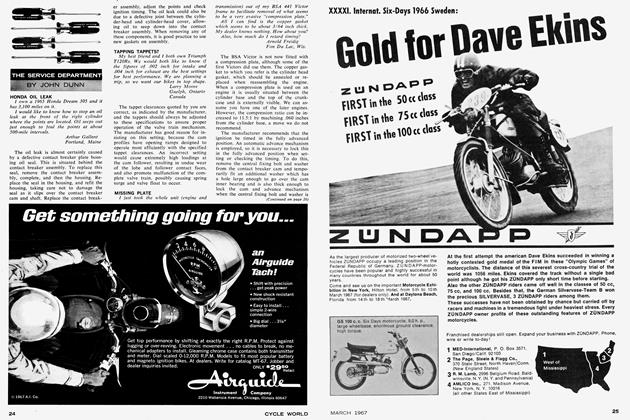
Service Department
SERVICE DEPARTMENT
JOHN DUNN
LOW GEAR GALLOP
I own a '65 Yamaha YDS3C which is driving me slightly nuts. In low gear with any load at all, the bike lurches as if a tooth (or several teeth) were missing somewhere in the gear train. However, 1 have checked out all teeth and they appear perfect. The rear sprocket and chain are brand new and are not loose. The countershaft sprocket and shaft are also in excellent shape. This lurching occurs only in low gear. 1 have run with only the right cylinder and only the left cylinder, but in both cases, the lurching is still there. The clutch is almost new and works well. About 100 miles ago, the engine was completely torn down to replace a stripped kick-starter gear, and up until now, has run well. It appears that low gear is bad somewhere, but I'm nearly at my wit's end trying to find out what. 1 should add that the shift mechanism works well for all gears. Any information would be greatly appreciated.
Richard A. Lovgren
Allison Park, Pa.
The problem that you are experiencing with low gear is most likely caused by insufficient depth of engagement of the sliding gear engaging dogs. This may be caused by worn dogs, a bent or worn selector fork, or excessive shaft end float.
It will be necessary to split the crankcases again. With the gears and selector mechanism in place, select low gear. The depth of engagement, end float and selector fork position can be checked in position. It is possible that when the engine was previously dismantled for attention to the kick-start mechanism, it was incorrectly reassembled. When you dismantle again, try not to disturb the position of the internals, for here may lie the solution to the problem.
If the bottom gear driving dogs are badly rounded, replace the gear.
STICKY PISTON
I own a Kawasaki 175 F2. When the motorcycle approaches 50 mph, a highpitched grinding sound occurs. Within a minute or so, the engine quits and 1 glide to a stop. The dealer has checked several things, but the engine still quits at 50 mph. The engine runs fine at speeds under 50 and starts up right away after the engine quits and 1 bring the machine to a stop. The motorcycle has 1,400 miles on it. Any suggestions?
Bill Rowe
Fort Wayne, Indiana
It would appear from the contents of
your letter that partial piston seizure is occurring when the piston temperature reaches a certain level. This condition is most likely caused by a distorted piston skirt or local high spots, caused by elevated piston temperatures during the breakin period. Piston skirt distortion and local high spots result in a very small working clearance between the piston skirt and the cylinder bore. Normal piston expansion would then cause a temperature rise resulting in extreme piston to cylinder wall loading and eventual seizure. After a brief cooling period, the engine can usually be restarted and will appear to run satisfactorily until the critical operating temperature is reached again.
Have your dealer remove the head, cylinder and piston and inspect the skirt, cylinder bore condition, wrist piston worli* ing clearances and bearing surfaces. A distorted piston will require replacement. Local high spots can usually be eased and the bore may need a quick lick with a hone.
PORT WORK
I have a 1966 500cc BS A with which I am very pleased. My question is, would it pay for me to check the alignment of the carburetor to the manifold and the manifold to the intake ports and polish the manifold, intake ports and exhaust ports? Would there be any improvement in performance, or would 1 only be wasting my time?
The reason I'm asking this question is because 1 did this kind of a job on an old opposed twin outboard motor and it was well worth the effort.
Harold Saye Milwaukee, Wis.
Very little increase in performance will be obtained by polishing the intake and exhaust ports, unless they are being reworked to accept a large valve. It is worth the effort of removing and blending-in any rough casting irregularities, and doing a precision valve job.
Matching the port to manifold and manifold to carburetor bore alignment is good practice, providing care is taken not to cause sudden changes in the cross-sectional area of the intake tract. Blend in carefully and gradually to obtain the best results.
WEAK 250
1 have a 1964 Honda 161 cc Super Sports model, and 1 would like to bore it out to 208cc or 209cc. 1 think I would have to remove about 0.015 from each cylinder. I would like to know if this engine was bored out, would I also have to change the stroke and the valves in any way?
I would like to get the rings hardened and swollen, as the engine is now running with this type of ring setup. If 1 changed the cam to a racing or 3/4 race cam, what other changes would have to be made? I am not going to race this machine; 1 just want a fast street machine.
Richard J. Almeida Arushnet, Mass.
An overbore of only 0.015 would increase the displacement of your engine to 163cc. A displacement of 208cc would
(Continued on page 12)
require an overbore of approximately 0.160. An increase or decrease in the stroke would also affect the displacement, and unless the change were very well engineered, it is not advisable to go this route.
Without making any other changes, the increase in displacement will result in an improvement in low and mid-range torque, with only a small increase in maximum horsepower. Naturally, acceleration and low speed snap response will be improved. Good volumetric efficiency (ability of the engine to "breathe") at high engine speeds will be impaired, because of the relatively small intake valve and port/carburetor combination. Therefore, if a substantial increase in maximum horsepower is desired, it will be necessary to employ a larger intake valve, increased port diameter and larger bore carburetor. A "hotter" camshaft would also help the top end; however, it would not provide the same increase as a well engineered intake arrangement. If an alternative camshaft is employed, obtain one from a well-known manufacturer, using the valve springs that he recommends, set to the right height.
I would suggest that you rework your engine progressively by the following stages until the performance meets with your individual requirements:
1. Increase displacement by boring.
2. Install "hot camshaft" and related valve spring combination.
3. Employ larger intake valve, carburetor and reworked intake port.
Before carrying out any of these modifications, it is essential that the rest of the engine is in first class condition. But better still, buy a 250.
STICKY QUESTION
/ have a problem which may be of general concern to owners of oil injection two-strokes who reside in the northern states.
Since oil arrives at the pumping mechanism solely by gravity, what reason is there to suppose that the normal 30 weight oil, which does nicely at summer temperatures, will not become too viscous to flow in sufficient quantity when winter arrives? Will it be so viscous as to clog the pump or fail to pass through the thin delivery tube? Anyone who doubts the propriety of this question can convince himself otherwise by leaving a can of his chosen 30 weight lubrication on the window sill over some 20F night, then up-ending the can the following morning.
Upon inquiry, I found that the local Yamaha and Suzuki dealers recommended, by and large, that 1 continue with 30 weight stuff regardless of the temperature (although this opinion varied somewhatdepending on the dealership consulted and the particular expert talked to within each shop). It was apparent, though, that these organizations had not given the problem much thought. The inhabitants of both the Yamaha and Suzuki booths at the New York Show also concurred in advocating 30 weight for all temperatures since "they had had no trouble."
(Continued on page 14)
A short while after these episodes I received a complimentary copy of Yamaha World, "official publication of the National Yamaha Owners Club," allegedly published on behalf of Yamaha International Corporation. In a lucid article on winterizing your bike, they recommend 10W-30 oil for temperatures down to 20F und 5W-20 oil for the range +~20F to — 20F. A subsequent letter to Yamaha International provoked a reply by a "factory service agent" to the effect that for temperatures down to 20F, 30 weight will suffice, but for the range +20F to ~20F, 5W-20 would be nice.
Sigh! Please tell me what weight oil I should use in my 305 Traumalia Autolube before my investment disintegrates for want of a 70ç can of oil. At present I am using Î0W-20W-30 weight Super Shell with excellent results thus far.
Neal J. Brower Cambridge, Mass.
Your letter is an interesting one, based on good reasoning. Having looked through several riders' handbooks, I cannot fail to agree with you, that information and instruction relating to the correct grade of lubricant to be used with two cycle engines (those employing auto lube systems) under extreme climatic conditions, is poor and totally inadequate.
The grade of oil (10W-20W-30) that you are using is a good all-round compromise, particularly at temperatures around freez-
ing (32F). I suggest the following grades as a general guide. A highly detergent oil with an MS rating is generally recommended by the majority of manufacturers. For temperatures above 50F, use an SAE 30 oil; for temperatures from 15F to 50F, use an SAE 10W-30 or SAE 10W-20W30 oil: for temperatures below 15F, use an SAE 5W-20 grade oil.
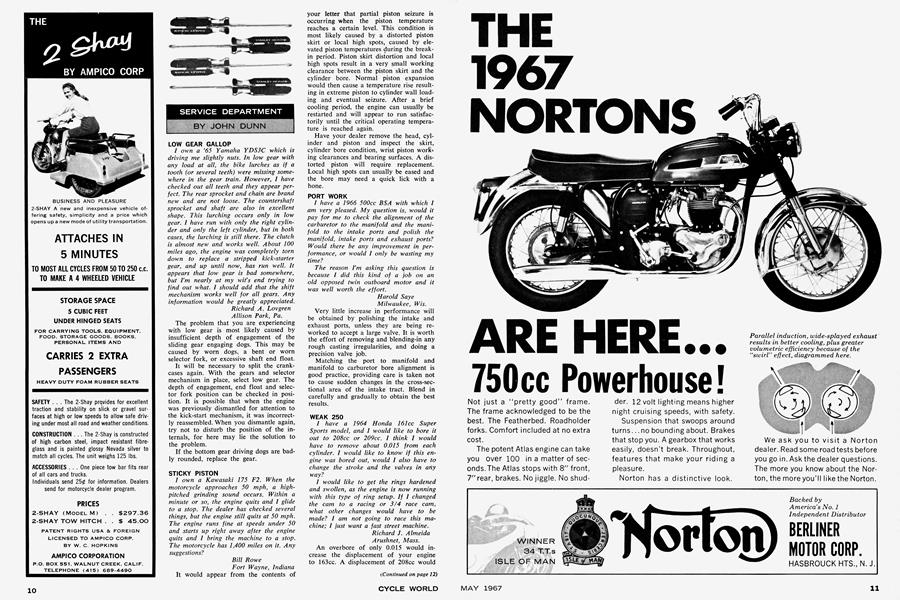
HOW TO TIME
I have a pre-unit construction Triumph 650 engine which I am building for a gas dragster. I have purchased a Harman & Collins Super drag cam, No. 6877. 1 also have a 1966 crankshaft and flywheel with new rods and inserts to withstand the strain demanded from a drag bike.
I have worked with Triumph engines for five years, but have never had the opportunity to time or degree cams. I have read service bulletins and manuals, but I still don't completely understand all the things that must be done to ensure a strong running drag bike.
Would you please explain to me a workable method for timing drag cams? 1 have a dial indicator, timing disc and cam gear puller.
Stanley R. Carey Charleston Hts., S.C.
When checking valve timing, it is first necessary to find tdc. Attach the timing disc securely on the drive side of the
crankshaft. Bring the piston to tdc and then construct a rigidly mounted pointer with the indicating tip positioned to coincide with the tdc mark on the timing disc. It is best to carry out this work (finding tdc) with the cylinder head removed: finding tdc by feel or with a dial indicator is impossible because of the lack of piston movement for a few degrees over the tdc period. It is best to construct a simple jig for this purpose.
A bar mounted across the top of the cylinder is all that is required if the piston is of the domed variety and protrudes from the cylinder bore at tdc. Having already found approximate tdc, turn the crankshaft slowly in a clockwise direction until the piston comes firmly to rest against the bar (or abutment screw), read off the position indicated by the pointer on the timing disc, then repeat, in an anti-clockwise direction, and read the position indicated by the pointer at this time. If the pointer and disc had been previously positioned to indicate true tdc, the positions indicated against the abutment would be an equal number of degrees before and after tdc. If this is not the case, move the pointer relative to the disc until an equal number of degrees is indicated either side of the tdc mark on the disc.
After tdc has been found, the engine can be assembled and the tappet clearance
(Continued on page 18)
adjusted to the checking clearance as indicated by the camshaft manufacturer. Be careful not to disturb the tdc pointer.
Attach a dial indicator securely to the cylinder head with the spindle in vertical alignment with the valve stem and the tip resting on a flat portion of the top spring retainer.
With the camshaft lobe and lifter contact on the base circle, adjust the dial indicator to zero.
Turn the crankshaft in its normal direction of rotation until the dial indicator needle indicates 0.001 of lift. The valve opening position is now recorded from the position on the crankshaft timing disc. Continue to rotate the crank until full lift is indicated on the dial indicator, record the position and lift, then continue to rotate the crank until the dial indicator shows 0.001 before closing. At this point, record the closing position. Before moving the indicator to the other valve, double-check your readings.
Repeat this procedure with the other valve, again double-checking to make certain.
Record your findings in the following manner:
Time the ignition before removing the crank timing disc and pointer.