Service
SERVICE
Paul Dean
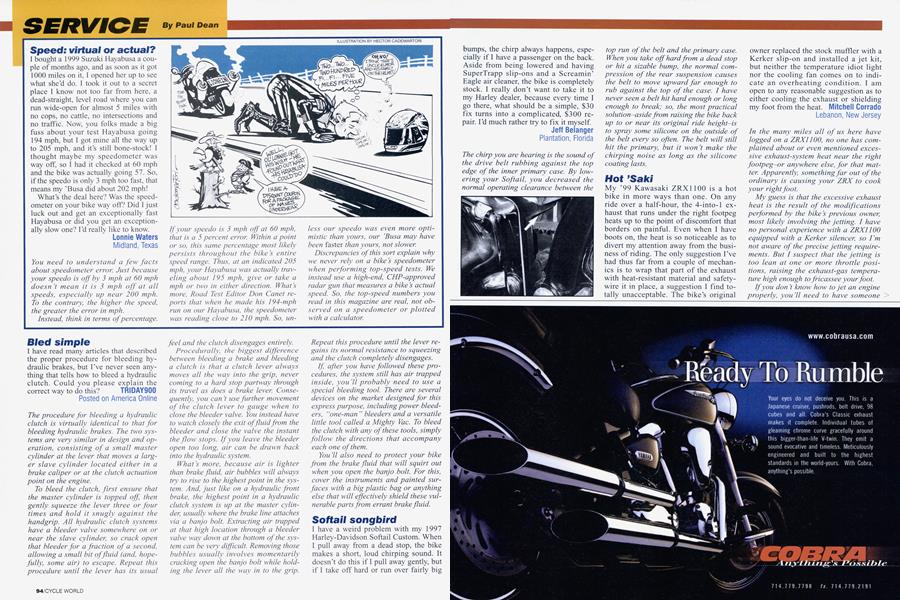
Speed: virtual or actual?
I bought a 1999 Suzuki Hayabusa a couple of months ago, and as soon as it got 1000 miles on it, I opened her up to see what she’d do. I took it out to a secret place I know not too far from here, a dead-straight, level road where you can run wide-open for almost 5 miles with no cops, no cattle, no intersections and no traffic. Now, you folks made a big fuss about your test Hayabusa going 194 mph, but I got mine all the way up to 205 mph, and it’s still bone-stock! I thought maybe my speedometer was way off, so I had it checked at 60 mph and the bike was actually going 57. So, if the speedo is only 3 mph too fast, that means my ’Busa did about 202 mph!
What’s the deal here? Was the speedometer on your bike way off? Did I just luck out and get an exceptionally fast Hayabusa or did you get an exceptionally slow one? I’d really like to know.
Lonnie Waters Midland, Texas
You need to understand a few facts about speedometer error. Just because your speedo is off by 3 mph at 60 mph doesn’t mean it is 3 mph off at all speeds, especially up near 200 mph. To the contrary, the higher the speed, the greater the error in mph.
Instead, think in terms of percentage.
If your speedo is 3 mph off at 60 mph, that is a 5 percent error. Within a point or so, this same percentage most likely persists throughout the bike ’s entire speed range. Thus, at an indicated 205 mph, your Hayabusa was actually traveling about 195 mph, give or take a mph or two in either direction. What’s more, Road Test Editor Don Canet reports that when he made his 194-mph run on our Hayabusa, the speedometer was reading close to 210 mph. So, un-
less our speedo was even more optimistic than yours, our 'Busa may have been faster than yours, not slower.
Discrepancies of this sort explain why we never rely on a bike’s speedometer when performing top-speed tests. We instead use a high-end, CHP-approved radar gun that measures a bike s actual speed. So, the top-speed numbers you read in this magazine are real, not observed on a speedometer or plotted with a calculator.
Bled simple
I have read many articles that described the proper procedure for bleeding hydraulic brakes, but I’ve never seen anything that tells how to bleed a hydraulic clutch. Could you please explain the correct way to do this? TRIDAY900 Posted on America Online
The procedure for bleeding a hydraulic clutch is virtually identical to that for bleeding hydraulic brakes. The two systems are very similar in design and operation, consisting of a small master cylinder at the lever that moves a larger slave cylinder located either in a brake caliper or at the clutch actuation point on the engine.
To bleed the clutch, first ensure that the master cylinder is topped off, then gently squeeze the lever three or four times and hold it snugly against the handgrip. All hydraulic clutch systems have a bleeder valve somewhere on or near the slave cylinder, so crack open that bleeder for a fraction of a second, allowing a small bit of fluid (and, hopefully, some air) to escape. Repeat this procedure until the lever has its usual
feel and the clutch disengages entirely.
Procedurally, the biggest difference heneen bleeding a brake and bleeding a clutch is that a clutch lever always moves all the way into the grip, never coming to a hard stop partway through its travel as does a brake lever. Consequently, you can’t use further movement of the clutch lever to gauge when to close the bleeder valve. You instead have to watch closely the exit offluid from the bleeder and close the valve the instant the flow stops. If you leave the bleeder open too long, air can be drawn back into the hydraulic system.
What’s more, because air is lighter than brake fluid, air bubbles will always try to rise to the highest point in the system. And, just like on a hydraulic front brake, the highest point in a hydraulic clutch system is up at the master cylinder, usually where the brake line attaches via a banjo bolt. Extracting air trapped at that high location through a bleeder valve way down at the bottom of the system can be very difficult. Removing those bubbles usually involves momentarily cracking open the banjo bolt while holding the lever all the way in to the grip.
Repeat this procedure until the lever regains its normal resistance to squeezing and the clutch completely disengages.
If after you have followed these procedures, the system still has air trapped inside, you ’ll probably need to use a special bleeding tool. There are several devices on the market designed for this express purpose, including power bleeders, “one-man ’’ bleeders and a versatile little tool called a Mighty Vac. To bleed the clutch with any of these tools, simply follow the directions that accompany each one of them.
You ’ll also need to protect your bike from the brake fluid that will squirt out when you open the banjo bolt. For this, cover the instruments and painted surfaces with a big plastic bag or anything else that will effectively shield these vulnerable parts from errant brake fluid.
Softail songbird
I have a weird problem with my 1997 Harley-Davidson Softail Custom. When I pull away from a dead stop, the bike makes a short, loud chirping sound. It doesn’t do this if I pull away gently, but if I take off hard or run over fairly big bumps, the chirp always happens, especially if I have a passenger on the back. Aside from being lowered and having SuperTrapp slip-ons and a Screamin’ Eagle air cleaner, the bike is completely stock. I really don’t want to take it to my Harley dealer, because every time I go there, what should be a simple, $30 fix turns into a complicated, $300 repair. Ed much rather try to fix it myself.
Jeff Belanger Plantation, Florida
The chirp you are hearing is the sound of the drive belt rubbing against the top edge of the inner primary case. By lowering your Softail, you decreased the normal operating clearance between the top run of the belt and the primary case. When you take off hard from a dead stop or hit a sizable bump, the normal compression of the rear suspension causes the belt to move upward far enough to rub against the top of the case. I have never seen a belt hit hard enough or long enough to break; so, the most practical solution-aside from raising the bike back up to or near its original ride height-is to spray some silicone on the outside of the belt every so often. The belt will still hit the primary, but it won’t make the chirping noise as long as the silicone coating lasts.
Hot'Saki
My ’99 Kawasaki ZRX1100 is a hot bike in more ways than one. On any ride over a half-hour, the 4-into-l exhaust that runs under the right footpeg heats up to the point of discomfort that borders on painful. Even when I have boots on, the heat is so noticeable as to divert my attention away from the business of riding. The only suggestion I’ve had thus far from a couple of mechanics is to wrap that part of the exhaust with heat-resistant material and safetywire it in place, a suggestion I find totally unacceptable. The bike’s original owner replaced the stock muffler with a Kerker slip-on and installed a jet kit, but neither the temperature idiot light nor the cooling fan comes on to indicate an overheating condition. I am open to any reasonable suggestion as to either cooling the exhaust or shielding my foot from the heat. Mitchell Corrado Lebanon, New Jersey
In the many miles all of us here have logged on a ZRX 1100, no one has complained about or even mentioned excessive exhaust-system heat near the right footpeg-or anywhere else, for that matter. Apparently, something far out of the ordinary is causing your ZRX to cook your right foot.
My guess is that the excessive exhaust heat is the result of the modifications performed by the bike’s previous owner, most likely involving the jetting. I have no personal experience with a ZRX 1100 equipped with a Kerker silencer, so I’m not aware of the precise jetting requirements. But I suspect that the jetting is too lean at one or more throttle positions, raising the exhaust-gas temperature high enough to fricassee your foot.
If you don’t know how to jet an engine properly, you ’ll need to have someone else do it for you; sorry, but there simply is insufficient room here to explain this multi-step process in adequate detail. If this is the case, I strongly suggest you take the bike to a reputable racebike tuner or high-performance mechanic to have the jetting checked and, if necessary, corrected. Also have him check the ignition timing and inspect for intakemanifold leaks, either of which could cause excessive exhaust temperatures.
In the event that a capable mechanic finds absolutely nothing wrong with the engine s state of tune and you re forced to cope with the hot exhaust in other ways, have a heat shield made to fit over the offending section of pipe. A half-decent fabricator could easily fashion a small, unobtrusive, flat-blackpainted shield that would sit a half-inch or so off the pipe; and if it is attached with insulated clamps, most of the exhaust heat will not reach the shield. A fabricator who makes one-off pieces for custom Harley-Davidsons would be a perfect choice for the job; surely there are dozens of such shops within 30 or 40 miles of your home in Lebanon.
VFR=Very Fast Roll-on
I have a ’98 Honda VFR Interceptor and would like to give it a little more roll-on performance without messing with the engine. I was thinking about adding two or three more teeth at the rear sprocket. I really don’t care about losing top-end speed because I never go much over 90 mph or so anyway. Would this rearsprocket change be enough to get the job done, or would I be better off to reduce the number of teeth at the front sprocket?
The 4 Bs Posted on America Online
All I can do is give you some numbers to ponder; whether or not any of them will “get the job done ” is entirely up to you, since the criteria they’ll have to meet is solely yours.
I do not, however, recommend swapping your VFR ’s stock, 17-tooth front sprocket for one with fewer teeth. A 17tooth sprocket already is smaller than ideal; most engineers feel that anything smaller than 19 or 20 teeth accelerates chain and sprocket wear, increases frictional losses and causes more chain noise. Nevertheless, most bike manufacturers usually work in the 15to 17-tooth range to preclude the need for unusually big rear-wheel sprockets or large-reduction (read: inefficient and bulky) primary drives, particularly when working with high-revving engines that require considerable gear reduction between the crankshaft and the rear wheel.
Given that caveat, your notion of adding two or three teeth at the rear is the most rational. The stock sprocket has 43 teeth, and going up just one more tooth would only increase rear-wheel torque by 2 percent-probably not enough to accomplish your objective. But a 45-tooth sprocket would boost rear-wheel torque by almost 5 percent, and 46 teeth would bump it 7 percent.
Want to put those numbers into realworld perspective? With stock gearing, your Interceptor makes 11 percent more rear-wheel torque in fifth gear than it does in sixth. A 45-tooth sprocket would yield almost half the current roll-on differential between fifth and sixth, while a 46-toother would make up almost twothirds of that difference.
Installing even the largest of these three bigger sprockets, the 46-toother, should pose no major problems other than the need to slightly modify the lower part of the chainguard for clearance. But you also should be aware that the engine rpm at any given road speed will increase by the very same percentage as the rear-wheel torque. At 65 mph, for example, your stock VFR now turns about 4460 rpm; with a 46-tooth rear sprocket, it will be spinning at approximately 4770 rpm. So, before you make a gearing change, be sure you can live with the higher levels of vibration, fuel consumption and exhaust pitch that will accompany it.
Got a mechanical or technical problem with your favorite ride? Can’t seem to find workable solutions in your area? Maybe we can help. If you think we can, either: 1) Mail your inquiry along with your full name, address and phone number to Cycle World Service, 1499 Monrovia Ave., Newport Beach, CA 92663; 2) fax it to Paul Dean at 949/631-0651 ; or 3) e-mail it to CW1Dean@aol.com. Don’t write a 10-page essay, but do include enough information about the problem to permit a reasonable diagnosis. And please understand that due to the volume of inquiries we receive, we can’t guarantee a reply to every question.