Suzuki 450 Carb Fix
SUZUKI 450 CARB FIX
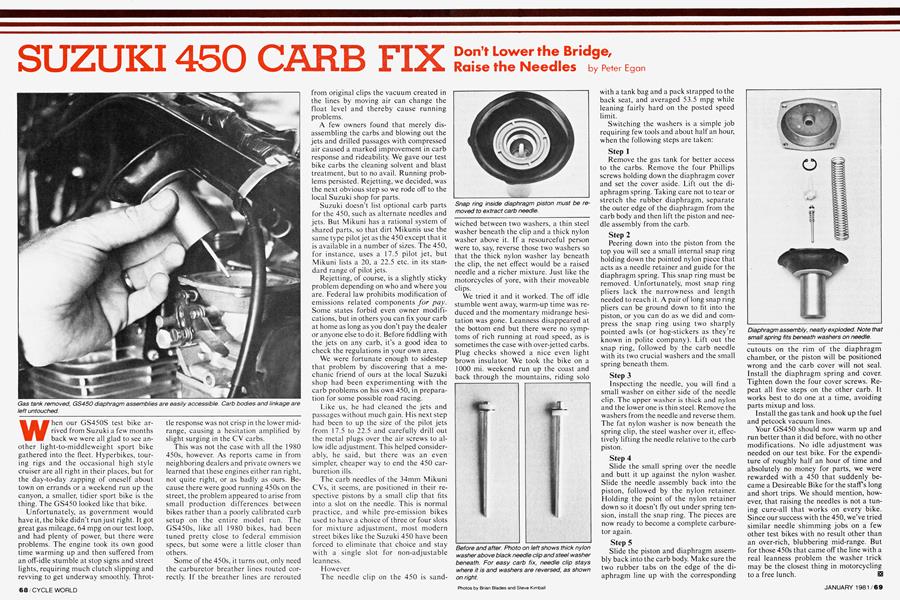
When our GS450S test bike arrived from Suzuki a few months back we were all glad to see another light-to-middleweight sport bike gathered into the fleet. Hyperbikes, touring rigs and the occasional high style cruiser are all right in their places, but for the day-to-day zapping of oneself about town on errands or a weekend run up the canyon, a smaller, tidier sport bike is the thing. The GS450 looked like that bike.
Unfortunately, as government would have it, the bike didn’t run just right. It got great gas mileage, 64 mpg on our test loop, and had plenty of power, but there were problems. The engine took its own good time warming up and then suffered from an off-idle stumble at stop signs and street lights, requiring much clutch slipping and revving to get underway smoothly. Throt-
tle response was not crisp in the lower midrange, causing a hesitation amplified by slight surging in the CV carbs.
This was not the case with all the 1980 450s, however. As reports came in from neighboring dealers and private owners we learned that these engines either ran right, not quite right, or as badly as ours. Because there were good running 450s on the street, the problem appeared to arise from small production differences between bikes rather than a poorly calibrated carb setup on the entire model run. The GS450s, like all 1980 bikes, had been tuned pretty close to federal emmision specs, but some were a little closer than others.
Some of the 450s, it turns out, only need the carburetor breather lines routed correctly. If the breather lines are rerouted from original clips the vacuum created in the lines by moving air can change the float level and thereby cause running problems.
A few owners found that merely disassembling the carbs and blowing out the jets and drilled passages with compressed air caused a marked improvement in carb response and rideability. We gave our test bike carbs the cleaning solvent and blast treatment, but to no avail. Running problems persisted. Rejetting, we decided, was the next obvious step so we rode off to the local Suzuki shop for parts.
Suzuki doesn’t list optional carb parts for the 450, such as alternate needles and jets. But Mikuni has a rational system of shared parts, so that dirt Mikunis use the same type pilot jet as the 450 except that it is available in a number of sizes. The 450, for instance, uses a 17.5 pilot jet, but Mikuni lists a 20, a 22.5 etc. in its standard range of pilot jets.
Rejetting, of course, is a slightly sticky problem depending on who and where you are. Federal law prohibits modification of emissions related components for pay. Some states forbid even owner modifications, but in others you can fix your carb at home as long as you don’t pay the dealer or anyone else to do it. Before fiddling with the jets on any carb, it’s a good idea to check the regulations in your own area.
We were fortunate enough to sidestep that problem by discovering that a mechanic friend of ours at the local Suzuki shop had been experimenting with the carb problems on his own 450, in preparation for some possible road racing.
Like us, he had cleaned the jets and passages without much gain. His next step had been to up the size of the pilot jets from 17.5 to 22.5 and carefully drill out the metal plugs over the air screws to allow idle adjustment. This helped considerably, he said, but there was an even simpler, cheaper way to end the 450 carburetion ills.
The carb needles of the 34mm Mikuni CVs, it seems, are positioned in their respective pistons by a small clip that fits into a slot on the needle. This is normal practice, and while pre-emission bikes used to have a choice of three or four slots for mixture adjustment, most modern street bikes like the Suzuki 450 have been forced to eliminate that choice and stay with a single slot for non-adjustable leanness.
However.
The needle clip on the 450 is sandwiched between two washers, a thin steel washer beneath the clip and a thick nylon washer above it. If a resourceful person were to, say, reverse those two washers so that the thick nylon washer lay beneath the clip, the net effect would be a raised needle and a richer mixture. Just like the motorcycles of yore, with their moveable clips.
Don't Lower the Bridge, Raise the Needles
Peter Egan
We tried it and it worked. The off idle stumble went away, warm-up time was reduced and the momentary midrange hesitation was gone. Leanness disappeared at the bottom end but there were no symptoms of rich running at road speed, as is sometimes the case with over-jetted carbs. Plug checks showed a nice even light brown insulator. We took the bike on a 1000 mi. weekend run up the coast and back through the mountains, riding solo with a tank bag and a pack strapped to the back seat, and averaged 53.5 mpg while leaning fairly hard on the posted speed limit.
Switching the washers is a simple job requiring few tools and about half an hour, when the following steps are taken:
Step 1
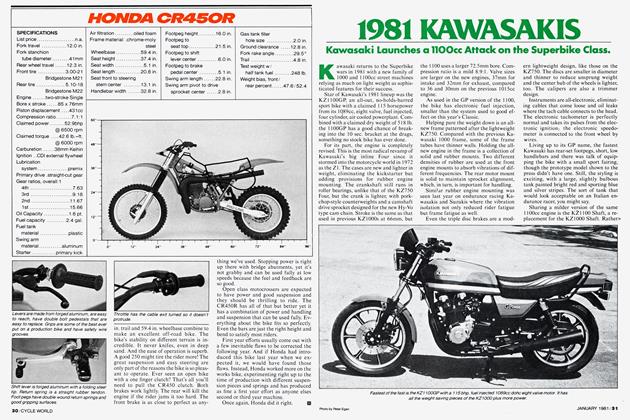
Remove the gas tank for better access to the carbs. Remove the four Phillips screws holding down the diaphragm cover and set the cover aside. Lift out the diaphragm spring. Taking care not to tear or stretch the rubber diaphragm, separate the outer edge of the diaphragm from the carb body and then lift the piston and needle assembly from the carb.
Step 2
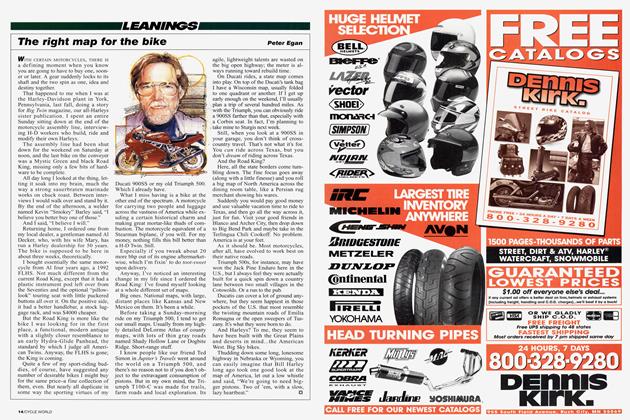
Peering down into the piston from the top you will see a small internal snap ring holding down the pointed nylon piece that acts as a needle retainer and guide for the diaphragm spring. This snap ring must be removed. Unfortunately, most snap ring pliers lack the narrowness and length needed to reach it. A pair of long snap ring pliers can be ground down to fit into the piston, or you can do as we did and compress the snap ring using two sharply pointed awls (or hog-stickers as they’re known in polite company). Lift out the snap ring, followed by the carb needle with its two crucial washers and the small spring beneath them.
Step 3
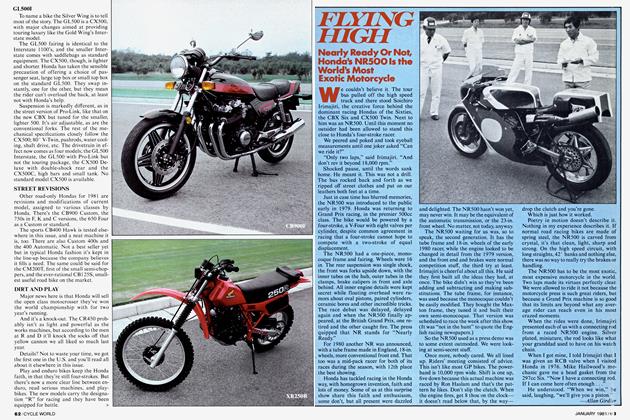
Inspecting the needle, you will find a small washer on either side of the needle clip. The upper washer is thick and nylon and the lower one is thin steel. Remove the washers from the needle and reverse them. The fat nylon washer is now beneath the spring clip, the steel washer over it, effectively lifting the needle relative to the carb piston.
Step 4
Slide the small spring over the needle and butt it up against the nylon washer. Slide the needle assembly back into the piston, followed by the nylon retainer. Holding the point of the nylon retainer down so it doesn’t fly out under spring tension, install the snap ring. The pieces are now ready to become a complete carburetor again.
Step 5
Slide the piston and diaphragm assembly back into the carb body. Make sure the two rubber tabs on the edge of the diaphragm line up with the corresponding cutouts on the rim of the diaphragm chamber, or the piston will be positioned wrong and the carb cover will not seal. Install the diaphragm spring and cover. Tighten down the four cover screws. Repeat all five steps on the other carb. It works best to do one at a time, avoiding parts mixup and loss.
Install the gas tank and hook up the fuel and petcock vacuum lines.
Your GS450 should now warm up and run better than it did before, with no other modifications. No idle adjustment was needed on our test bike. For the expenditure of roughly half an hour of time and absolutely no money for parts, we were rewarded with a 450 that suddenly became a Desireable Bike for the staff s long and short trips. We should mention, however, that raising the needles is not a tuning cure-all that works on every bike. Since our success with the 450, we’ve tried similar needle shimming jobs on a few other test bikes with no result other than an over-rich, blubbering mid-range. But for those 450s that came off the line with a real leanness problem the washer trick may be the closest thing in motorcycling to a free lunch.