Suzuki Gt750 Carb Synchronization
THE SERVICE DEPT
JODY NICHOLAS
SUZUKI GT750 CARB SYNCHRONIZATION
MANY multi-cylinder motorcycles with separate carburetors require special equipment to accurately synchronize the carburetors. This requires that the owner invest in special equipment, or have his carburetors adjusted at a repair shop, either of which can run into a sizable amount of money.
But the Suzuki GT750’s three carburetors (one for each cylinder) can be set accurately with only a 10mm open end wrench, a 14mm open end wrench and a screwdriver.
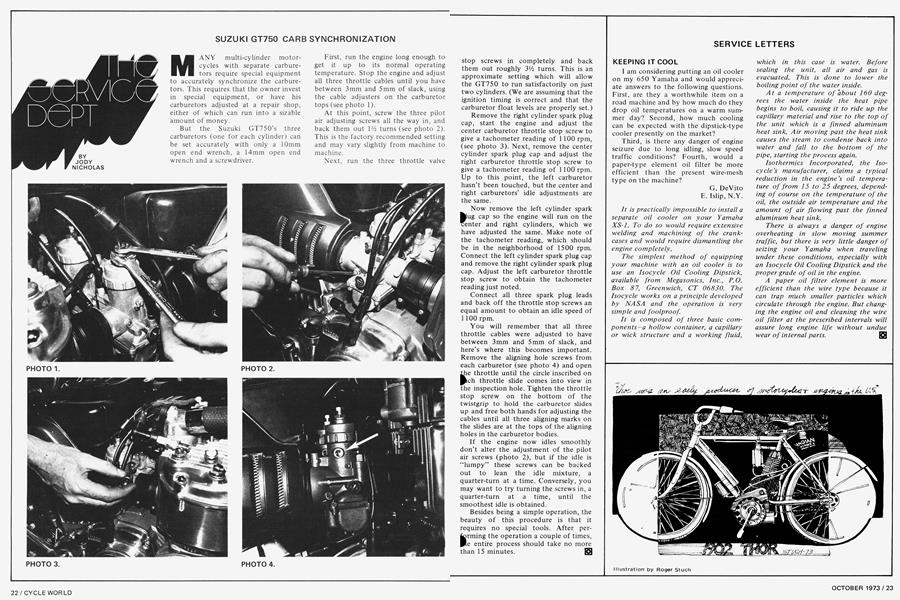
First, run the engine long enough to get it up to its normal operating temperature. Stop the engine and adjust all three throttle cables until you have between 3mm and 5mm of slack, using the cable adjusters on the carburetor tops (see photo 1).
At this point, screw the three pilot air adjusting screws all the way in, and back them out IV2 turns (see photo 2). This is the factory recommended setting and may vary slightly from machine to machine.
Next, run the three throttle valve stop screws in completely and back them out roughly 7xh turns. This is an approximate setting which will allow the GT750 to run satisfactorily on just two cylinders. (We are assuming that the ignition timing is correct and that the carburetor float levels are properly set.)
Remove the right cylinder spark plug cap, start the engine and adjust the center carburetor throttle stop screw to give a tachometer reading of 1100 rpm, (see photo 3). Next, remove the center cylinder spark plug cap and adjust the right carburetor throttle stop screw to give a tachometer reading of 1100 rpm. Up to this point, the left carburetor hasn’t been touched, but the center and right carburetors’ idle adjustments are the same.
Now remove the left cylinder spark fc^ug cap so the engine will run on the center and right cylinders, which we have adjusted the same. Make note of the tachometer reading, which should be in the neighborhood of 1500 rpm. Connect the left cylinder spark plug cap and remove the right cylinder spark plug cap. Adjust the left carburetor throttle stop screw to obtain the tachometer reading just noted.
Connect all three spark plug leads and back off the throttle stop screws an equal amount to obtain an idle speed of 1100 rpm.
You will remember that all three throttle cables were adjusted to have between 3mm and 5mm of slack, and here’s where this becomes important. Remove the aligning hole screws from each carburetor (see photo 4) and open e throttle until the circle inscribed on ch throttle slide comes into view in the inspection hole. Tighten the throttle stop screw on the bottom of the twistgrip to hold the carburetor slides up and free both hands for adjusting the cables until all three aligning marks on the slides are at the tops of the aligning holes in the carburetor bodies.
If the engine now idles smoothly don’t alter the adjustment of the pilot air screws (photo 2), but if the idle is “lumpy” these screws can be backed out to lean the idle mixture, a quarter-turn at a time. Conversely, you may want to try turning the screws in, a quarter-turn at a time, until the smoothest idle is obtained.
Besides being a simple operation, the beauty of this procedure is that it requires no special tools. After per-
Írming the operation a couple of times, e entire process should take no more than 15 minutes.