Everything You Ever Needed (or Wanted) To Know About Motorcycle Drive Chains
EVERYTHING YOU EVER NEEDED (OR WANTED) TO KNOW ABOUT MOTORCYCLE DRIVE CHAIN
The Facts On Lubrication, Adjustment, Size, Loading, And Good Design
J. G. Krol
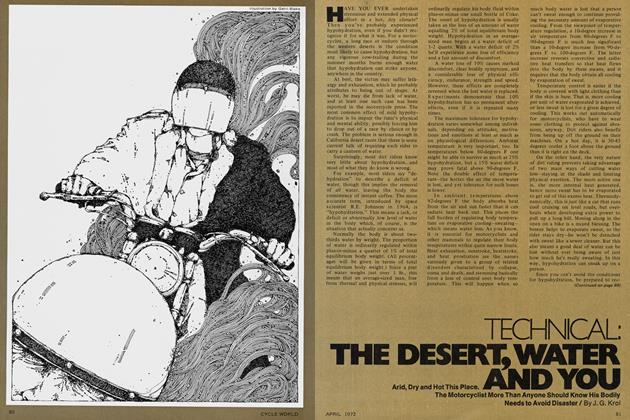
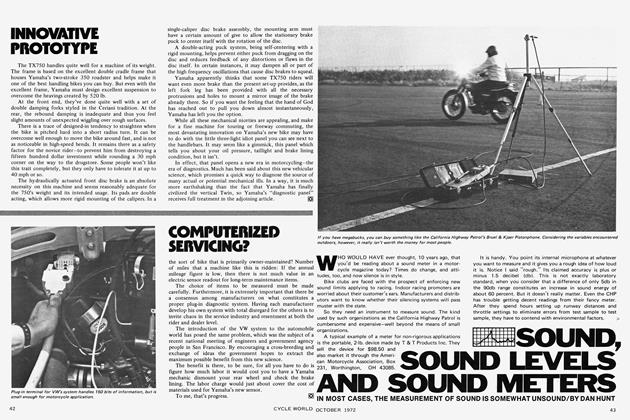
DRIVE CHAINS have one of the most miserable jobs of any part of a motorcycle. They must withstand the pulsating power of a few-cylindered engine, the reversing loads of compression braking, and the shock loads of power shifts and of landing after free-wheeling jumps. Because designers try to save weight, size and cost, most motorcycle chains operate well beyond the limits normally recommended by roller chain manufacturers. Dirt, scanty lubrication and misadjustment add to the problems of the exposed rear drive chain. Almost every possible condition that could shorten a chain’s service life is found on a motorcycle.
The basic factors of chain and sprocket size, speeds and loads, and the drive system’s geometry are all built-in by the motorcycle designer and there’s little you can do about them except, possibly, buy a different motorcycle. But you can do something about lubrication and adjustment, and you should if you want to extract maximum life and reliability from your chains.
Because designs and operating conditions vary so much there is no practical way to lay down rotes for lubrication and adjustment that are both sound and universal; so in addition to describing several basic maintenance methods, I will try to explain what these methods are intended to accomplish, and why. With this information you can confidently improvise to handle unusual situ-r ations.
WHERE TO LUBRICATE
There are four places on a chain that need lubrication: the pin/bushing bearing, between the bushing and the roller, between the overlapping sideplates, and the roller/sprocket interface.
By far the most important of these four is the pin/bushing bearing which is the primary load-carrying interface in a chain. Lubrication is required to reduce friction, in order to reduce the rate of wear and to protect against galling. This may require extreme pressure (EP) additives in the lubricant, because this joint oscillates back and forth, much like a wrist pin in the small end of a connecting rod, thus preventing the buildup of a steady hydrodynamic film of oil between the pin and its surrounding bushing. If nothing else on the chain gets oil, this joint must.
Oil between the bushing and its surrounding roller serves primarily as a
hydraulic shock absorber against the dynamic impact forces created as each link of the chain engages a tooth of the sprocket. The roller does not do any significant amount of rotating around the bushing so friction control is not a big problem here. Neither is friction control very important between the overlapping sideplates for the simple reason that, in a properly aligned chain system, there are no significant lateral loads. Lubrication in these two areas is secondary in importance to lubrication in the pin/bushing joint.
Even as gears are designed so that their teeth roll across each other during engagement, chains and sprockets are designed so that each roller seats into a tooth-pocket without any rolling or sliding. This means there is no real need for lubrication on the outside of the roller or on the sprocket, except to protect the metal against rust and corrosion.
So on an exposed chain the functions of lubrication come down to three things: friction control in the pin/bushing bearing, shock absorbtion between the bushing and roller, and rust prevention on all the external surfaces. Of course, it is always better if the chain operates in an oil bath with force feeding of oil spray where the chain engages each sprocket, but for an exposed chain these three functions pretty well sum up what you can reasonably expect to accomplish.
HOW TO LUBRICATE
Since the only way lubricant can reach the critical pin/bushing joint is to travel down between the overlapping sideplates, then turn the corner into the bearing, it is clear that the upper edges of the sideplates, where they overlap, must be your first concern. Lubricant applied down" the middle of the chain cannot get to the load-carrying bearings and is almost entirely wasted. Worse, it is just more juice to fly off and spatter on the motorcycle and your clothes.
To guide the lubricant into the sideplates, make use of the rear sprocket. Apply lubricant to the upper edges of the sideplates as they move around the lower part of the rear sprocket, while you slowly turn the wheel backward (bike on centerstand). As the lubricant dribbles down the sides of the sprocket, it will drip into the overlapping sideplates...which is exactly where you want it to go. In the process, you will get more than enough lubricant to the rest
of the chain. Note that you cannot lubricate the pin/bushing joint without automatically getting more than enough lubricant between the sideplates on the way.
If you are using one of the popular spray-can products, you can facilitate reaching the inner chain edge—between sprocket and wheel—by bending the last quarter-inch of the plastic applicator tube back on itself, using heat to soften the tubing and set the bend.
Any lubricant will penetrate better if both it and the chain are warm, so the best time to lubricate a chain is right after a run, when it is well-heated from its own friction. Let the freshly lubed chain sit awhile, preferably overnight, then lightly wipe the surface with a rag to remove excess lubricant that would only be thrown off anyway. This light wiping will not remove the thin film of oil that protects the chain from rust, and that’s all that’s needed on the outer surfaces.
HOW OFTEN TO LUBRICATE
Nobody ever lubricated a chain too often. Do not confuse this with the amount of lubricant applied. It is very common for riders to try to compensate for infrequent lubrication by dumping on far too much at one time. Loose, fluid oil on the exterior of the chain does no good and simply gets thrown off. It is far better to apply a little oil along the edges often than to douse the chain heavily at infrequent intervals. Here are some useful tests.
First, if there is visible rust on the chain it has gone too long without lubrication. Rust traces will first appear between the overlapping sideplates, and this is the spot you want to watch. If the chain rusts despite frequent lubrication, change lubricants.
Second, make it a habit to end a day’s ride by coasting to a stop, ignition off and in neutral, over a smooth, clean driveway (to minimize tire noise). Listen sharply for whirring, clicking, “chain-like” noises from the rear chain. The sound will be different for different motorcycles, brands of chain, and brands of lubricant, but you should easily be able to establish a pattern for your machine. A freshly well-lubed chain should be relatively quiet; as it dries out, the whirring will become more noticeable. That’s your signal to lubricate.
Third, you can pull the master link for a direct physical inspection. The pins should have visible oil on them. By the way, spring-clip master links and so-called half-links are definitely weaker than the normal links of a chain and should receive special attention when you’re lubricating. It’s not a good idea to R&R the master link often unless you replace the clip with a new one, for it tends to get beat up with frequent prying on and off. The advantage of this inspection is that it is the absolute test of how much lubricant is getting to the pins and bushings, which is not necessarily related to the amount of goo on the outside.
Fourth, whenever the chain “looks dry” you might as well lubricate it if you have the time and energy. You certainly won’t do any harm. On a long trip, it takes just a couple minutes after gassing up to squirt a light bead along the outer edge of the chain and sprocket, then wipe off the excess. In a pinch you can do this by walking the bike along by quarter-turns of the rear wheel, resting it each time on the sidestand. If you can talk the gas jockey into walking the bike for you, the whole thing takes but a moment.
Remember that oil-throwing does prove that you got too much lubricant on the outside of the chain, and made no attempt to wipe off the excess, but does not prove that the inner working parts are receiving enough oil. In fact, beyond a certain speed, the chain’s bearing will gall from lack of lubrication even though the chain is running submerged in an oil bath. Most built-in chain oilers found on motorcycles merely dribble oil on the middle of the chain. This flies off and makes a mess... but the bearings may still be starved for lubrication, so in many cases it is actually more effective to turn off the oiler and lubricate regularly by hand.
WHAT KIND OF LUBRICANT?
In order to penetrate between the sideplates a lubricant has to be thin. In order to provide good shock-cushioning it has to be thick. This conflict can be approached several ways.
The thinnest lubricant recommended for motorcycle chains is SAE 20 motor oil, which is a pretty good chain lubricant in its own right, especially since modern MS oils are generously doctored with EP and anti-rust additives. Thin lubricants like sewing machine oil or LPS No. 1 are not suitable for general use, but in a pinch they are certainly preferable to not lubricating the chain at all. Semi-solid lubricants like grease, tallow, beeswax and asphaltum (which is intended for very large and slowmoving industrial chains) are entirely impractical for general use and I cannot recommend them.
Dry-film lubricants provide negligible shock-absorbtion, but can be very successful under extremely dusty riding conditions. At the other extreme, heavy-bodied rust-preventatives like LPS No. 3 or Petrochem ESP are not ideal lubricants so far as load-carrying and friction reduction are concerned, but their unapproachable degree of rustprevention may give the best overall results in extremely wet riding conditions.
Most commercial chain lubes contain solvents which thin or “reduce” the fluid during application, thus aiding penetration. Afterward the solvent evaporates, leaving behind a much thicker oil stock. Try squirting a few drops of a proprietary lube onto a handy surface and letting it sit a few days. You may be surprised to discover just how thick some brands are after their solvent evaporates.
Petrochem’s Chain Life is, I understand, the most popular single brand of chain lubricant these days. Originally developed as a cutting fluid for hard-tomachine metals like titanium, it was only accidentally found to work well on motorcycle chains. Its spray-can convenience is shared by several other brands, but its unique convenience feature is the way it foams up on application, keeping things as tidy as possible.
Another interesting product is the Dirt Rider’s concoction of solid-lubricant EP and friction-reducing additives (like molybdenum disulfide, graphite and Teflon). You get the additives, a plastic applicator bottle, and a comprehensive booklet telling you how to mix your own motor oil and solvent to obtain a rather sophisticated lubricant that is almost ridiculously cost-effective in comparison to spray-can products.
I have come across some chain lubricants sold by commercial chain suppliers that are intended, evidently, for use indoors and inside of machinery; they contain no rust inhibitors and are therefore unsuited for use on motorcycles. As for the plethora of brandname chain lubricants of mysterious composition the question is: do they really provide a combination of penetration, shock-absorbtion and rust-prevention that is significantly better than plain old SAE 20 motor oil for your motorcycle and riding conditions? If you are applying any lubricant correctly, slinging-off—of which much is often made in advertisements—should not be a big problem.
TESTING CHAIN LUBRICANTS
Individual applications vary so much, and there are so many variables involved that have nothing whatever to do with the lubricant itself, that it is very difficult to believe any one lubricant stands clearly and consistently superior to all other types and brands. The acid test is to try two different chain lubes under the very same conditions.
Remove the rear chain and clean it thoroughly in solvent to remove all original lubricant. Mark off half the chain, by spraying the sideplates with a can of aerosol lacquer. Measure and note the percent elongation (see below) of each half of the chain individually. It is preferable to start with a new or nearly new chain. Now lubricate each half with a different lubricant in the regular manner. After some time, recheck the percent elongations. The half with less wear enjoyed the better of the two lubes. Advertising claims notwithstanding, I would be surprised if you found any significant differences, but if you do carry out this test, be sure and send your results to CYCLE WORLD’S Feedback column, including such pertinent information as the type of bike, number of sprocket teeth, length of test, frequency of lubrication and riding conditions.
CAR WASHES
The do-it-yourself quarter car wash is a great boon to motorcyclists since the hot, high-pressure, potent-detergent spray makes short work of cleaning out the accumulated crud in the thousand nooks and crannies of a motorcycle. This same spray also does nasty things to carburetors, fork vents, ignition wiring, wheel bearings, and chains. Someday... maybe... motorcycle manufacturers will stop making excuses and do something to make their products car washproof. Meanwhile, there are two ways you can help the exposed rear chain.
First, you can avoid playing the spray directly on the chain. The water which drips onto it should not wash off the rust-preventing film of lubricant, and if it does, you should consider changing lubricants.
The second approach, which I recom> mend, is to blast off all the build-up of muck and crud on the chain by direct application of the spray. Do the chain last, then immediately spray it down with a generous application of waterdisplacing “snake oil” like DuPont Penetrating Lubricant and Moisture Guard or LPS No. 1 (or No. 25, which is another name for exactly the same product). Look for phrases like, “displaces water,” “removes moisture,” or “penetrates moisture,” which are always found on the labels of true snake oils.
Now you can let the water evaporate in its own good time, for the snake oil will have literally worked its way through the surface water and formed a barrier between the water and the underlying metal of the chain. Later on, you can lubricate in the normal manner. Do not wait until you get home to use the snake oil since the heat-treated high-carbon steel parts of a chain will rust within minutes once denuded of their protective coating of lubricant. Besides, a medium-size can of snake oil is so blasted handy for so many things, you ought to have one always along in your tool kit (would you believe it stops the pain of poison oak?).
ADJUSTMENT
There are five modes of possible misadjustment you have to consider in a chain drive.
Shaft tilt is the condition where the chain must run in a twisted surface, rather than a plane, because the shafts are not parallel in the vertical direction, e.g., due to a bent swinging arm. In most cases, the normal lateral clearances in a chain allow it to absorb amounts of tilt below the level that would cause motorcycle handling problems without undue wear.
Shaft splay is the condition where the transmission output shaft and rear axle are not parallel in the horizontal plane. This is commonly due to misalignment of the axle in its slack adjustment slots, causing the chain to bow sideways. An effective check is to measure the distances between swinging arm pivot axis and rear axle on the left and right sides. They should be equal.
Sprocket offset arises when the sprockets are parallel, but not in the same plane. Side-by-side street-and-trail sprockets are an example of built-in offset. Offset can also arise in the primary drive if you improperly replace various washers and spacers, and this is likely to be harmful since the short, multi-strand primary chain has much less tolerance for offset than the longer rear chain.
In each of these three cases a roller chain has a sort of tolerance band on both sides of a perfectly aligned condition. In other words, once the tilt, splay or offset is small enough, there is no added advantage to making it yet smaller. This means that splay, tilt and offset you can’t see with a careful eyeballing is not worth worrying about, which is just as well, because few motorcycles allow enough room around the sprockets to enable you to lay straightedges across the faces of the sprockets, which is the preferred method of checking alignment.
So get yourself behind the motorcycle and sight carefully along the sides of the rear and output sprockets to see how well they’re lined up. Arranging some flashlights or electric lamps to light the sprockets at a favorable angle will help you see what’s going on. If you have a pair of binoculars handy, sight through one side of these to collapse the perspective between the two sprockets. If you cannot see any tilt, splay or offset, the alignment should be close enough, but it’s surprising how many bikes are running around with misalignments so bad that even a casual glance serves to identify them.
A special note on the Whitney No. 625 chain often recommended as a retrofit for 750 Hondas: This chain is manufactured with extremely small lateral clearances and has, therefore, correspondingly less tolerance for tilt, splay and offset, so exercise particular care in lining up the sprockets. Those same small clearances pose special problems for the Honda owner trying to get lubricant down between the sideplates to the pin/bushing joint. Other chains, the plated DID is one that comes to mind, are made with unusually large lateral clearances, so can tolerate more than usual amounts of misalignment. An old dirt rider’s trick is to replace a narrow, original equipment chain with a No. 40 ( 1 /2-in. pitch) or No. 50 (5/8-in. pitch) ANSI standard chain, which is wider, so will tolerate more offset.
Sprocket runout is a condition where the sprocket is not perfectly round and/or not perfectly planar. This can arise from uneven sprocket wear, bent shafts, poorly fitting overlay sprockets, bent sprockets, loose sprockets, sloppy shaft bearings, or some poorly done modification or repair. If a brand new chain seems to vary its slack noticeably as you rotate it around, the cause is probably radial sprocket runout. Runout accelerates the wear of chain, sprockets and bearings by a variety of subtle dynamic effects that are more serious at higher speeds. Anything that introduces vibration, oscillation, wobbling or fluttering adds high-frequency dynamic loads to the system, causing all parts of it to wear faster than normal.
Large amounts of runout that call for replacing some component can be detected by fixing a pointer to the frame (a piece of wire, etc.), rotating the rear wheel, and observing whether the sprocket tracks true relative to the pointer. Amounts of runout that can be detected only by means of a dial indicator gauge are unlikely to be troublesome in normal dirt and street riding, but can become serious at sustained high racing speeds, especially on machines that already have marginally designed drive systems.
Chain slack is the fifth most common, and practically, the most important adjustment. The golden rule is this: The slack should never go to zero under any condition. The chain must never be under static tension, for this creates abnormal and extreme loads on the chain and the shaft bearings.
The best way of regulating slack is by means of a spring-loaded idler sprocket that is located on the unloaded side of the larger of the two active sprockets. A slipper follower is less desirable than an idler sprocket, but it is smaller and cheaper. A spring-loaded tensioner has the additional benefit of reducing and damping vibrations and surges, which can become the main source of chain wear at high speeds. Larger pitch chains naturally want to operate at proportionately slower speeds, and it is a fact that both the typical 3/8-in. pitch primary chain and 5/8-in. pitch rear chain are at or beyond their recommended maximum operating speeds when the motorcycle is going near its own top speed, say, 70 mph and up.
With a spring-loaded tensioner of suitable design, the axle adjustment slots can be eliminated, at some gain in strength, rigidity, and unsprung lightness, and, of course, the need to adjust the chain periodically is also eliminated. When you consider that, besides all this, a spring-loaded tensioner helps to cushion the massive impact shocks of sudden applications of power, popping the clutch, etc.—which leads to smoother and more controllable power deliveryit is indeed amazing that they are so rarely seen.
As for primary chains that have no provision whatsoever for adjustment, not even an adjustable follower, I can think of no description except bad design. All you can do in such a case is to replace the chain when it wears enough to develop too much slack.
Slack of the rear chain is normally adjusted by sliding the rear axle in slots provided in the swinging arms. Good design practice is to provide an adjustment travel about two pitches long, but many motorcycles have much less.
Under conditions of reversing and pulsating and shock loads the optimum slack adjustment is that which gives just a trace of slack under the condition for minimum slack. This optimum adjustment will reduce wear, but more importantly, it will greatly reduce the likelihood of snapping a chain clean in half. The first step is to find the condition for minimum slack.
With the bike on a stand, rough adjust the axle position so the chain has only a small amount of free play when you wiggle it up-and-down and backand-forth at a point midway between the sprockets. The chain should be warm and the lubricant should be fresh, for old, cold lubricant will fill up the clearances between pins and bushings, making the chain seem much tighter than it really is. You can always warm it judiciously with a propane torch.
Now rotate the back wheel while you wriggle the chain, looking for the spot at which it feels tightest. Mark this condition by applying a dab of paint or yellow weatherstrip adhesive to both chain and rear sprocket in line with the projection of the swinging arm. Now continue rotating and wriggling. If the tightness is due mainly to uneven chain wear it will reappear every time the mark on the chain gets around to the same position. If it is mainly due to sprocket eccentricity, it will show up when the mark on the sprocket reaches its original position. Normally you will have a combination of the two, so it’s a good idea to continue rotating through many turns until you are satisfied that you have found that combination of chain position and sprocket position that makes the chain tightest. Note that position.
The next step is to find the position of the swinging arm in which the chain is tightest. The sketch shows that the center-to-center spacing of the output and rear wheel sprockets will be greatest, hence slack the least, when output shaft S, swinging arm pivot P and axle A form a straight line. For constant spacing the axle would have to swing in arc CAC’ about the output sprocket, but it actually moves in arc A’AA” about the swinging arm pivot axis. This means the slack varies as the swinging arm flexes.
Less variation is definitely desirable and is achieved by locating the output sprocket as close to the swinging arm axis as possible in the horizontal direction, having a high ratio of swinging arm length to suspension travel, and locating the output sprocket vertically so that the three points line up right in the middle of the range of suspension travel. A bike whose output sprocket is far forward of the swinging arm pivot, and whose maximum shaft spacing occurs at or even beyond one end of the suspension travel (which doubles the variation in slack) is sure to eat chains.
Remove one end of one shock and swing that shock out of the way. With the other shock on its softest setting, a helper should be able to work the suspension over its full travel while you, armed with straightedge and eyeball, hunt for the condition where S, P and A form a straight line. With the chain, sprocket and suspension each in its position for minimum slack, you can now move the axle so that this minimum amount of slack is just barely greater than zero...so the chain is not quite taut. Under all other conditions, of course, the slack will be greater. This is the optimum slack adjustment for a motorcycle chain. Be sure to check for shaft splay. You may have to work back and forth between splay and slack before both are correct.
After tightening everything down, set the bike on its sidestand or centerstand and measure the amount of up-anddown play of the chain at some reference point between the sprockets, e.g., next to a frame tube, for use in future adjustments. All you have to do next time is to spin the wheel until you locate the chain and sprocket positions that give least slack, then draw up the axle adjuster nuts an equal number of turns until the free-play is reduced to this measured amount; you won’t have to play with the suspension again. Remember, though, that it is always better to err on the side of too much slack, rather than have the chain go completely taut under any condition.
WEAR-OUT AND REPLACEMENT
Chain wear is measured in terms of “percent elongation,” or percent “stretch” if you prefer. To measure percent elongation, clean the chain in solvent to remove thickened lubricant residue, lay the chain on the floor, and carefully push the links together, one at a time, as much as you can. Measure the overall length. Now pull the chain out and measure overall length again. This difference, divided by the nominal length of the chain and multiplied by 100, is the percent elongation. The nominal length is simply the number of links times the pitch of each link-which is ordinarily 1/2 or 5/8 in. for rear chains. The chain is worn out when percent stretch reaches 3. Sideways bowing is not a reliable indicator of wear. Example: a 5/8-in. pitch chain with 110 links is worn out when elongation reaches 1 10x0.625x0.03=2.06 in. For maximum sprocket life of three to five chains, replace the chain before it reaches 3 percent. By the way, this elongation is due to simple wear on the pins and bushings, and the metal of the chain does not literally “stretch.”
If you are lucky enough to have axle adjustment slots as long as two pitches you should be able to run the chain through its full useful life by simply drawing up the axle, which only has to move one pitch to take up two pitches of slack. Otherwise, youTl have to remove two links when the axle reaches the back of its slot, starting over at the front. If the slot is so short the chain will not now reach, you have three options, in descending order of desirability: (1) Grind out the slot to lengthen it if this can be done without compromising strength or rigidity. (2) Use an offset-link assembly and two master links. (3) Use a half-link. Avoid halflinks if you can, since they are weaker than an ordinary master link. In any case, it is false economy to remove more than two links—which represent about 2 percent wear themselves on a typical rear chain—since operating the chain beyond the 3 percent level not only destroys the sprockets, it courts chain breakage...an effective way of destroying an expensive crankcase casting.
(Continued on page 126)
Continued from page 69
Chains lubricated and adjusted as described will last longer and, more importantly, be much less likely to snap completely, but many of the most important problems were built into the motorcycle at the factory. It does not take any great skill to design a chain drive properly, and a drive designed to standard guidelines could easily last 500,000 miles! For example, 16 teeth should be the minimum size for an output sprocket, with 25 teeth preferable, yet some bikes come with 13tooth output sprockets and the dealer will sell you one with only nine...a sure way to build sales of replacement chains. Judging from the locations of some output sprockets relative to the swinging arm pivots, there are motorcycle companies in which the engine designers and the chassis designers refuse to talk to each other.
But the basic problem seems to be that 90 percent of motorcyclists fatalistically and docilely accept short-lived, troublesome chain drives as a necessary and inescapable fact of life, while the other 10 percent are willing and able to spring for a couple hundred dollars more to buy a machine with shaft drive. The surprising thing is that all the indications are that a properly designed chain drive could be just as long-lived and trouble-free as the best shaft drives, and still turn out cheaper, lighter, more compact, and more efficient. Until enough buyers demand better chain drive systems that the manufacturers decide to respond, the best you can do is to keep your chain properly lubricated and adjusted to avoid making a bad problem worse. [o]