The Service Department
THE SERVICE DEPARTMENT
JOHN DUNN
DRIVING ISSUE
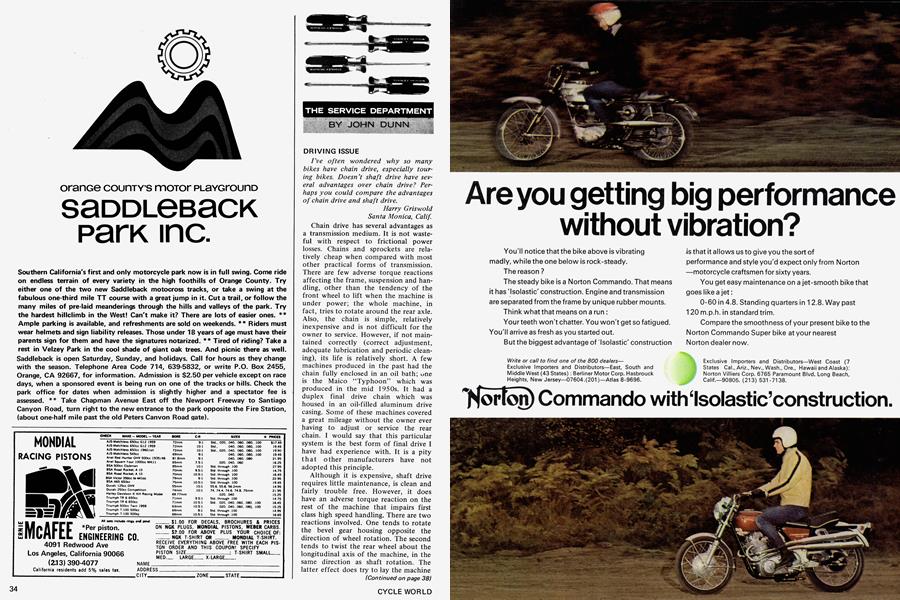
I’ve often wondered why so many bikes have chain drive, especially touring bikes. Doesn’t shaft drive have several advantages over chain drive? Perhaps you could compare the advantages of chain drive and shaft drive.
Harry Griswold Santa Monica, Calif.
Chain drive has several advantages as a transmission medium. It is not wasteful with respect to frictional power losses. Chains and sprockets are relatively cheap when compared with most other practical forms of transmission. There are few adverse torque reactions affecting the frame, suspension and handling, other than the tendency of the front wheel to lift when the machine is under power; the whole machine, in fact, tries to rotate around the rear axle. Also, the chain is simple, relatively inexpensive and is not difficult for the owner to service. However, if not maintained correctly (correct adjustment, adequate lubrication and periodic cleaning), its life is relatively short. A few machines produced in the past had the chain fully enclosed in an oil bath; une is the Maico “Typhoon” which was produced in the mid 1950s. It had a duplex final drive chain which was housed in an oil-filled aluminum drive casing. Some of these machines covered a great mileage without the owner ever having to adjust or service the rear chain. I would say that this particular system is the best form of final drive I have had experience with. It is a pity that other manufacturers have not adopted this principle.
Although it is expensive, shaft drive requires little maintenance, is clean and fairly trouble free. However, it does have an adverse torque reaction on the rest of the machine that impairs first class high speed handling. There are two reactions involved. One tends to rotate the bevel gear housing opposite the direction of wheel rotation. The second tends to twist the rear wheel about the longitudinal axis of the machine, in the same direction as shaft rotation. The latter effect does try to lay the machine on its side or pick it up, depending on whether the power is turned on or off. This naturally causes some strange effects in the handling department.
(Continued on page 38)
Continued from page 34
T-BOLT TRAUMA
I own a 1964 BSA 650-cc Thunder'* bolt which has recently been giving me much trouble. About 1000 miles after a routine engine rebuild, in which rings and bearings were replaced and the valves ground, the left side rod bearing went and the engine seized. After tearing the engine down and being unable to discover the cause, I consulted a dealer.
The dealer replaced a bent crankshaft, pistons and rings, all crankshaft bearings, a new left side con rod, and checked out the oil pump. On my way home, five miles from the dealer, at about 45 mph the left side rod bearing went again in a puff of smoke.
The dealer replaced the bad bearings and the oil pump gears. I got about 45 miles out of it and then the same bearing went again. This time the dealer put in a new oil pump, replaced the necessary bearings, and after reassembling, attached an oil pressure gauge which showed 35 lb. of oil pressure.
Before I rode the bike away, I checked the oil return line into the oil tank and found it barely sputtering. The dealer replaced the oil pump again and checked the ball check valve in the engine sump. The oil lines between the engine and oil tank are both new standard BSA parts.
Now the dealer says the engine pumps 35 lb. when it starts, but soon after the sump goes dry and the oil return line in the oil tank starts sputtering.
Joe Karten Scars dale, N. Y.
The trouble could be caused by one or more of the following malfunctions.
Oil tank filter sludged. The oil tank filter is situated in the lower right-hand corner of the oil tank. Unscrew and remove filter, clean thoroughly with gasoline and dry with high pressure air line. If the oil tank has not been thoroughly cleaned during previous engine rebuilds, remove it and clean out all sludge deposits.
Oil pipes. Remove and clean oil pipes. When replacing them ensure they are connected correctly. They are correctly connected when the pipes cross over each other. The outer pipe on the tank is connected to the inner connection on the crankcase.
Oil pressure control. The oil pressure is controlled by a pressure release valve situated on the right crankcase below the timing case. At engine speeds above 3000 rpm the oil pressure is controlled by the release valve at 50 psi. If the relief spring is corroded or weak the valve will open early resulting in a low oil pressure. The correct length of a new spring should be 0.609 in. The non-return valve situated behind the oil pump body should also be checked. The correct free length for this spring is 0.8125 in. Low oil pressure could also be caused by excessive clearance of the timing side main bearing due to a high rate of leakage at this point. Lack of pressure at the rod bearing could be caused by clogged crankshaft sludge trap eliminating the oil supply to the big ends. The left rod bearing is the farthest point in the oiling circuit so it would be affected first.
It is not uncommon for the oil return to the tank to spit oil and air. This demonstrates that the scavenge pump is working properly. The scavenge pump has greater capacity than the pressure pump for obvious reasons. As soon as all the excess oil that has accumulated in the crankcase has been returned to the tank the scavenge pump will suck both air and oil from the crankcase.
Rod bearing clearances. If the rod bearing housing is out of round, the crankpin worn or oval, or the rod bearing clearance incorrect, this could cause a premature bearing failure. Check the bearing housing for roundness. It should be round to within 0.0004 in. If not the rod will require rebuilding. Check the condition of the crankpin. Measure the rod bearing clearance, which should be between 0.0015 in. and 0.0025 in.
(Continued on page 43)
Continued from page 38
SWITCH HITTER
I have a “battery ” problem, and I hope you have some suggestions. Cycle dealers are scarce here in the boondocks, and “chain saw mechanics” aren’t too much help.
The battery on my Yamaha CT-1 Enduro seems to “go down” when the bike is ridden, rather than charging up. When the ignition key is turned on, the green neutral light pops on, and the horn will blow briskly. After a couple of minutes running, the battery seems to “die”; the horn and stoplights do not work, and the neutral light is very faint and it dies completely when the brakes are applied. Usually, the battery “recovers” in a few hours. This afternoon I tried it: turned on key and the horn blew. I haven’t touched it again until just now (five hours later) and the battery seems dead.
Four weeks ago, I accidentally left the switch in the No. 2 position (ignition and headlight) for three days. I removed the battery, had it charged, and it seemed fine. Then, this problem started. (The battery only works the neutral light, horn and stoplight. Headlight and engine are on the magneto.) Any suggestions?
Charles Jacob, Jr.
Rocky Ford, Colo.
It is unlikely that leaving the ignition switch on caused any damage other than possible damage to the ignition coil. But the fact that the machine will still start and run without protest indicates that the coil is all right. It is possible that when you had the battery recharged it was accidentally “reverse charged.” This condition would result in a malfunction similar to yours. If you ran the machine, for several hours, the battery should become recharged correctly. However this is not advised as the rectifier might be overloaded and damaged. In fact, the rectifier may have suffered damage already. I suggest you remove the battery and check it for correct polarity. This is done by connecting a volt meter to the battery terminals, with the positive lead connected to the positive terminal. If the battery is charged correctly, the meter will show the correct voltage reading. If the battery has been “reverse charged,” the meter needle will kick in the opposite direction. If the battery has been “reverse charged” have it recharged correctly. It is also possible that severe damage has not occurred.
SMOKE, SMOKE
My son had a Cub that was smoking so badly it was known as “Smokie. ” I noticed a letter about this problem in a previous Service Department column, and your advice was very helpful to me as a starting point. However, I had to do a bit more work to stop the smoking, and thought other readers might benefit from my experience.
I machined a .312 in. wide groove .005 in. deep around the bottom of the oil ring groove and then enlarged the oil return holes in the piston to .125 in., being careful not to cut into the bottom of the oil groove. No more smoke.
J.A. Windsor Oxnard, Calif.
Many thanks for your letter, Mr. Windsor. The modifications carried out on the piston appear to have been beneficial with respect to oil control. However, a word of advice. The effect of drilling or enlarging holes in the piston should not be treated to lightly. The piston is a highly stressed component which operates at a temperature that greatly reduces its strength. A hole may lead to failure due to cracking. Surface imperfections created during machining result in stress risers from which cracks are most likely to start. It is therefore good practice to remove any machining marks. The sharp edge of a freshly machined hole can also have the same effect. Chamfer the ends of each hole to minimize the chance of a crack starting. If you did not attend to these details when you modified the piston, it may be well worthwhile to remove the piston to check for cracks.