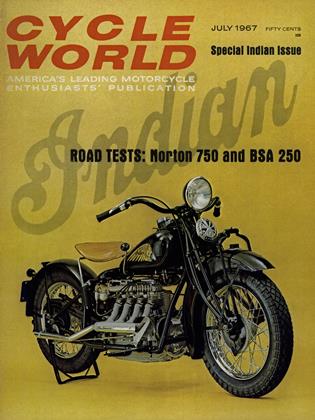
The Motorcycle Tourists Guide
THE MOTORCYCLE TOURISTS GUIDE
EQUIPPING THE BIKE FOR TOURING
A MOTORCYCLE outfitted for touring is different in appearance from bikes used for other purposes — scrambles and dirt track racers, for example. The dirt riders usually have little use for such goodies as full fenders, speedometers, lighting equipment and chain guards, and they throw them away at the first opportunity. But the touring rider finds these items indispensable. It can be expensive to rescue a stripped bike from a dirt rider and try to convert it to a road machine. Also, dirt bikes usually lead hard lives, so it’s best to start with a bike that’s fully equipped.
FENDERS
A machine may look racy with no front fender and a bobbed rear fender, but a road rider soon discovers the value of full fenders both fore and aft. Wheels have a way of throwing off any loose material they run through, and without fenders the rider gets it right in the face and down the back of the neck. One rider gave up the stubby fender route after hitting a large deposit of fresh cow exhaust. So to prevent being splattered by dirt, rain, snow, mud, blood and crud, equip your road machine with full length fenders. The rear chain guard serves a similar purpose, preventing chain lubricant from being thrown all over the machine, rider and luggage.
LIGHTS
Keeping your lighting equipment in good working order can be a bother, but it’s not wise to start a trip without good lights. You can’t predict exactly where you will be at dusk each day during a trip, and riding after dark without lights that last five or 10 miles to your destination can lead to disaster. If your battery is more than a few years old, or has been in a discharge condition for a long period of time, it may be best to buy a new one before starting on a trip. It’s difficult to have dependable lights without a good battery. For added safety put strips of Scotchlite reflective tape in various locations on the bike, particularly on the rear fender near the taillight. It is brightly visible at night from a surprising distance and may warn other drivers of your presence, should you have lighting trouble.
RIDING POSITION
Since riding comfort is of prime importance on a long trip, give time and thought to making your bike as comfortable as possible. Begin by adjusting the handle bars to the most satisfactory position. If they seem impossible to adjust to a comfortable position, consider buying a different type. They may even be custommade to your specifications, if the available styles don’t please you. Foot pegs on many machines are adjustable for height and you might experiment to find the most satisfactory position. If your bike is equipped with crash bars, mounting an extra set of foot pegs on the bars provides an occasional change of position for your feet. If you tend to slide forward or back on the seat, one end or the other could possible be raised or lowered.
It is a matter of individual preference and there are many different opinions on the subject, but the following recommendations will serve as a starting point in finding the riding position that seems most comfortable for you. Your hands should contact the bars so that your wrists are not bent. The ends of the handle bars should support your hands when your grip is relaxed, not pointed down so that your hands tend to slide off. Your hands should be a little below the level of your elbows, and your elbows slightly bent. Control levers should be somewhat below horizontal and within easy reach of the finger tips. Lean forward slightly at the hips, bracing a little of your weight against the handle bars. Your back should be neither rounded or ram-rod stiff. Knees bent, of course, but not at a sharp angle. Feet should be positioned far enough back to enable you to ease your weight off the saddle before hitting a large bump
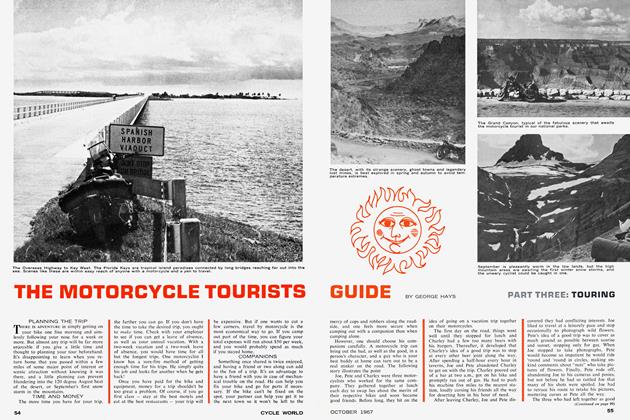
WINDSHIELD
The wind in your face may be exhilarating on a short ride, but on a long trip, a windshield is well worth its price. It keeps the wind out of your eyes so you can ride without goggles, and protects your face from wind burn. Also, you can travel at speed with less fatigue, because you don’t have to hang on against a 70 mph wind. Some riders may start their touring careers without windshields, but after a few trips with their sun and windburned faces peeling off in layers, and the front of their jackets splattered with bugs, they grudgingly adopt them. You might think that a windshield would cut down on performance and gas mileage, but this is not necessarily the case. With a well-designed windshield, the bike is more streamlined and gas mileage usually improves. The fairing type shield cuts down wind resistance so much you can cruise with a fraction of the throttle opening otherwise necessary, resulting in less strain on the engine and markedly improved gas mileage.
PART TWO: TOURING
GEORGE HAYS
Mount the shield on the bike so that you look over the top, not through it. Thus vision is not impaired, and the wind will still be deflected up over your head. Extend the windshield as far down in front as practical. If you leave a gap between the bottom of the shield and the top of the handlebars, a fierce blast of air will blow through, making the ride almost as drafty as without a shield. After the windshield is in place, don’t become alarmed because the motor sounds as though it is ready to fall apart. A windshield seems to magnify and direct noises up to your ears, and you can almost hear the spokes creak. You soon get used to this and it’s a small price to pay for the added comfort.
A valuable addition to the windshield is one of the leather windshield bags sold by Harley-Davidson dealers. The bag provides a convenient place for comb, chap stick, sun glasses, maps and the many small items that would otherwise become lost in the saddle bags.
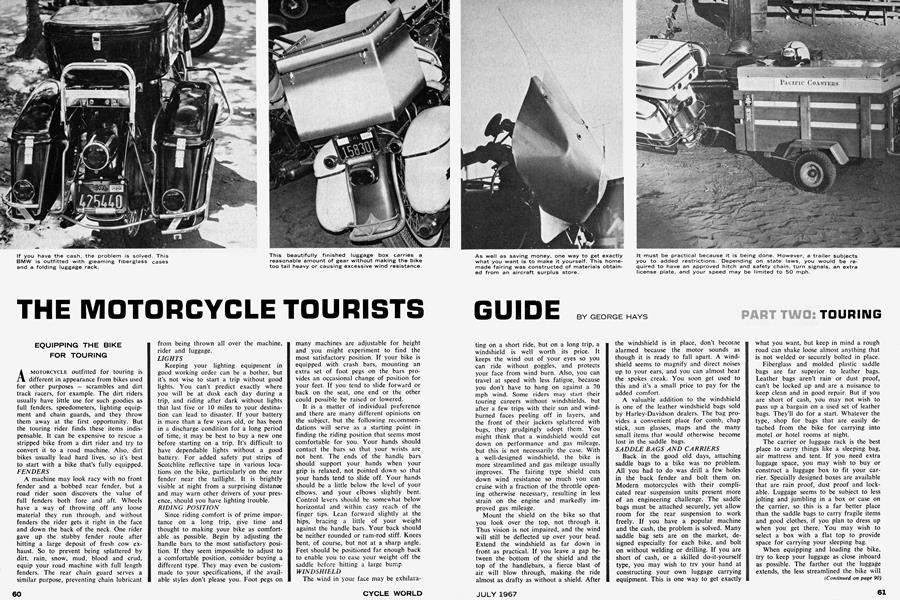
SADDLE BAGS AND CARRIERS
Back in the good old days, attaching saddle bags to a bike was no problem. All you had to do was drill a few holes in the back fender and bolt them on. Modern motorcycles with their complicated rear suspension units present more of an engineering challenge. The saddle bags must be attached securely, yet allow room for the rear suspension to work freely. If you have a popular machine and the cash, the problem is solved. Many saddle bag sets are on the market, designed especially for each bike, and bolt on without welding or drilling. If you are short of cash, or a skilled do-it-yourself type, you may wish to try your hand at constructing your own luggage carrying equipment. This is one way to get exactly what you want, but keep in mind a rough road can shake loose almost anything that is not welded or securely bolted in place.
Fiberglass and molded plastic saddle bags are far superior to leather bags. Leather bags aren’t rain or dust proof, can’t be locked up and are a nuisance to keep clean and in good repair. But if you are short of cash, you may not wish to pass up a bargain on a used set of leather bags. They’ll do for a start. Whatever the type, shop for bags that are easily detached from the bike for carrying into motel or hotel rooms at night.
The carrier or luggage rack is the best place to carry things like a sleeping bag, air mattress and tent. If you need extra luggage space, you may wish to buy or construct a luggage box to fit your carrier. Specially designed boxes are available that are rain proof, dust proof and lockable. Luggage seems to be subject to less jolting and jumbling in a box or case on the carrier, so this is a far better place than the saddle bags to carry fragile items and good clothes, if you plan to dress up when you get there. You may wish to select a box with a flat top to provide space for carrying your sleeping bag.
When equipping and loading the bike, try to keep your luggage as close inboard as possible. The farther out the luggage extends, the less streamlined the bike will be, with a resulting drop in power and gas mileage.
(Continued on page 90)
TIRES AND GEARING
Keep good tires on your touring machine. They provide good braking, less danger from flats, blow outs and skids, and are the cheapest life insurance you can buy. The best tread patterns for highway use seem to be a universal type tread for the rear wheel and the rib type tread for the front wheel. Select a front tire that has the “ribs” of the tread separated by small cross grooves, dividing the tread pattern into small rectangles. This type of tread helps to solve the problems of front tire wear, “heel and toe” wear, where the front part of the tread divisions wear down faster than the rear part, and “peaking,” the sides of the tread wearing down much faster than the center. Dirt treads or “knobbies” wear alarmingly fast on the pavement. A good set of knobbies can be wiped out in just a few thousand miles of highway travel, while road treads can be expected to last 10,000 miles or more.
Many bikes, particularly the larger ones, seem a bit low geared for all-out highway travel. Fitting a rear tire a size or two wider, or installing a rear sprocket with two or three less teeth, or an engine sprocket with one more tooth often results in a slower turning, more vibrationfree engine. Maximum top speed may be reduced by five mph, but the overdrive effect is well worthwhile.
MISCELLANEOUS
Many machines are not equipped with side stands, and it can be rather difficult to lift a machine, fully loaded for touring, up on the center stand. If you face this problem, you may wish to install an accessory side stand. Get one that fastens securely, so it won’t slip and allow the bike to fall over, and install it so that it won’t drag on the road when the bike is heeled over on a sharp curve.
Throttles that automatically close by spring tension when released are good safety devices. They keep the engine idled down if the bike and rider should accidentally part company. But it can become tiresome holding the throttle open against this spring tension hour after hour on a trip. If the twist grip on your machine isn’t equipped with a thumb screw to hold the throttle in a set position, you may wish to install one that is. Some twist grips have a small set screw and locknut that can be converted to a thumb screw simply by backing off the locknut and soldering a penny in the screw slot.
The ignition system of a touring machine should be fairly waterproof. It’s bad enough to be caught in a rain storm, without having to dry off the wires and plugs every few miles to keep going. Make sure your bike is equipped with good quality spark plug cables, and spark plugs should be protected by some sort of shield that extends down over the porcelain.
Although setting up a bike for touring can be a tiresome job, don’t neglect it. You will be well rewarded by a comfortable, more enjoyable journey. ■